What to Do After the Shot on a Deer (Step-by-Step)
The shot is only half the hunt.
What you do in the next 30 minutes determines whether you recover the deer—or lose it.
Most tracking problems don’t start on the trail.
They start immediately after the shot.
This step-by-step guide walks through exactly what to do after the shot so you can recover more deer consistently.
Step 1: Watch the Deer Carefully
After the shot, don’t move.
Watch everything you can:
- Direction of travel
- Body posture
- Tail position
- How the deer reacts
Key indicators:
- Mule kick → often a lung hit
- Hunched run → possible gut shot
- Slow walk → uncertain hit
Pick a landmark where you last saw the deer.
This becomes critical later.
Step 2: Listen After It Disappears
Once the deer is out of sight, your ears matter more than your eyes.
Listen for:
- Crashing (often means it went down)
- Slowing down
- Direction changes
Many recoveries are easier because hunters paid attention here.
Step 3: Stay Put (Don’t Climb Down Too Soon)
This is where most mistakes happen.
Adrenaline pushes hunters to:
- Climb down quickly
- Start tracking too early
- Push the deer farther
Instead:
- Sit still
- Replay the shot
- Give it time
Step 4: Wait the Right Amount of Time
Waiting improves recovery odds more than anything else.
General guidelines:
- Double lung → 30–60 minutes
- Heart → 15–30 minutes
- Liver → 4–6 hours
- Gut → 6–12 hours
If you’re unsure—wait longer.
Pushing a deer turns a short recovery into a long one.
Step 5: Mark the Shot Location
Before climbing down:
- Identify exact impact point
- Use trees, rocks, or landmarks
- Drop a GPS pin if possible
The start of the trail matters more than anything that follows.
Step 6: Approach the Shot Site Slowly
When you climb down:
- Move quietly
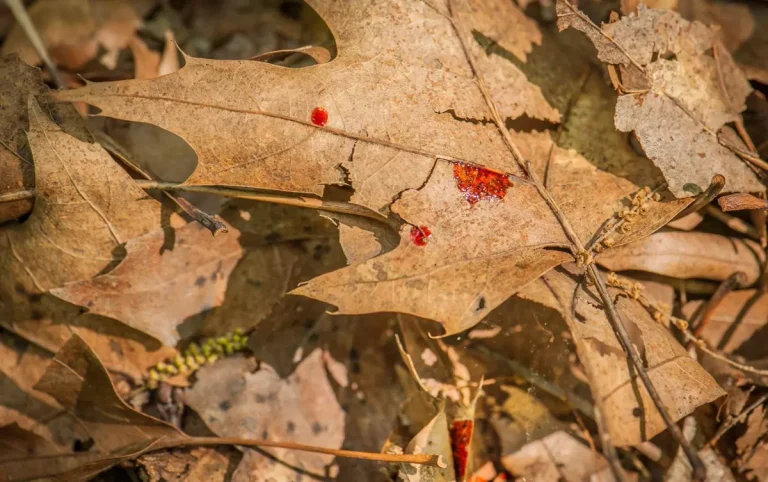
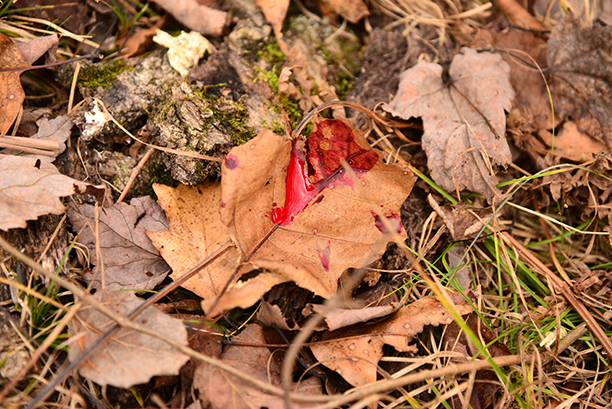
- Look for initial blood
- Look for hair
- Confirm direction of travel
Do not rush ahead.
You are building the trail from the start.
Step 7: Start Tracking with Discipline
Once you begin tracking:
- Move slowly
- Follow confirmed sign only
- Avoid stepping on blood
- Mark last blood when unsure
If you lose the trail:
- Go back to last confirmed sign
- Expand slowly
- Look for direction changes
For full tracking strategy:
How to Blood Track a Deer at Night (Step-by-Step Guide)
Step 8: Prepare for Night Tracking
If tracking continues into dark:
- Have your headlamp ready
- Move slower than during daylight
- Focus on contrast, not brightness
For gear recommendations:
Best Hunting Headlamps for Blood Tracking
Step 9: Expect the Last 50 Yards to Be the Hardest
Most blood trails are lost near the end.
Deer often:
- Change direction
- Bed down briefly
- Move toward thick cover
Slow down here more than anywhere else.
For deeper insight:
Why Most Blood Trails Are Lost in the Last 50 Yards
Common Mistakes After the Shot
- Tracking too soon
- Not watching the deer long enough
- Failing to mark last sighting
- Moving too fast on the trail
- Letting emotion override patience
Most lost deer are caused by decisions—not bad shots.
How This Fits Into Your Overall Setup
Recovery success starts before the shot.
Your gear, positioning, and patience all play a role.
For a complete system:
Deer Hunting Gear Guide (Complete Resource)
Final Thoughts
The shot doesn’t end the hunt—it changes it.
If you:
- Stay patient
- Observe carefully
- Track methodically
You’ll recover more deer and lose fewer opportunities.
Rushed decisions are the biggest mistake you can make after the shot.